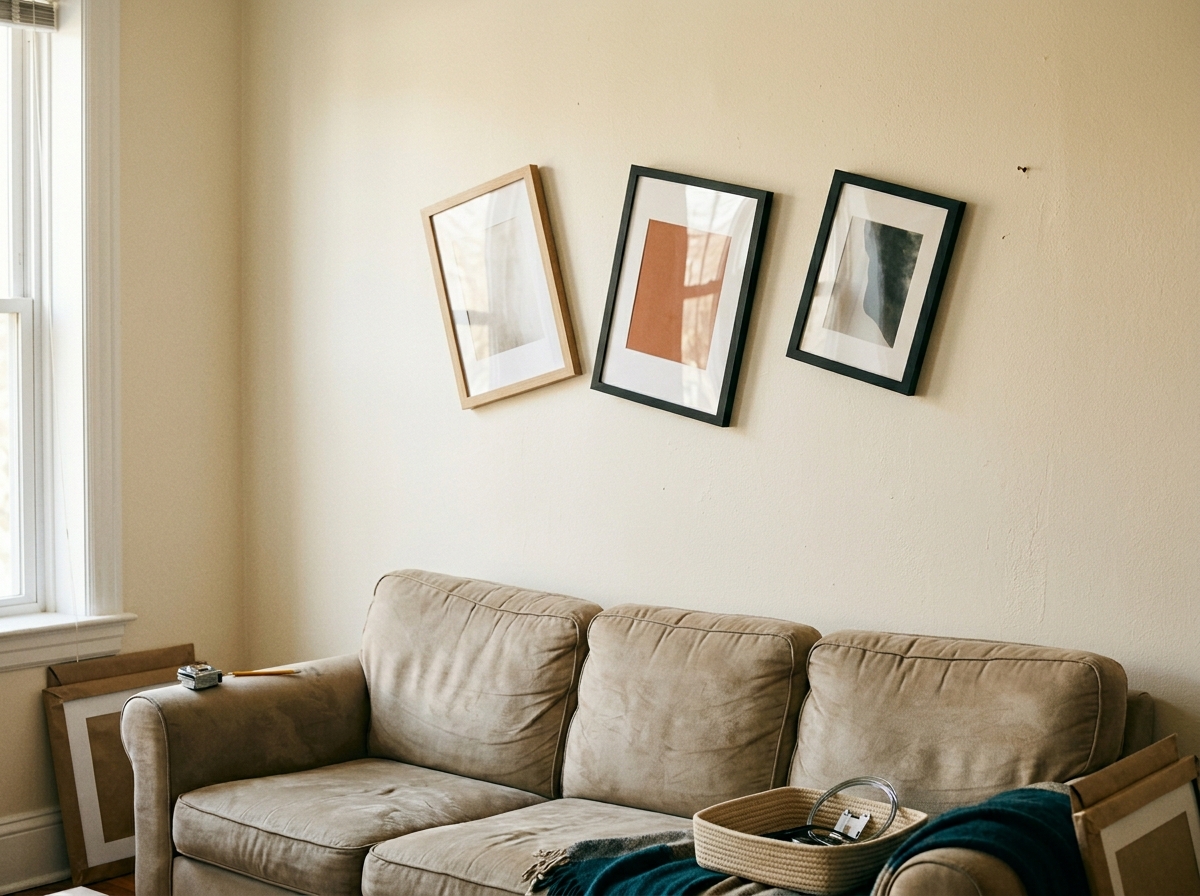
A gallery wall planner is a way to make every mistake on paper before any mistake gets made in drywall. Renters routinely skip the step. You buy seven frames, you pick a wall, you hold up the biggest one, you eyeball the center, you drill the first hole. Forty-five minutes later, half the frames are an inch and a half off, the spacing is uneven, there’s a stray hole behind the third frame that doesn’t line up with anything because you re-measured halfway through, and the deposit deduction line on the eventual move-out form has quietly added a new entry.
The honest truth about hanging frames in a rental is that the planning step is the entire decision. A drilled hole is irreversible in the rental-deposit sense. You patch it before move-out, or you lose the money. Which means a gallery wall fails at the planning stage, not the hanging stage. Hanging is mechanical transfer of a plan that already exists. If the plan is solid, the wall stays clean. If the plan was eyeballed, the wall pays for it twice.
Why gallery walls go wrong before the first hole
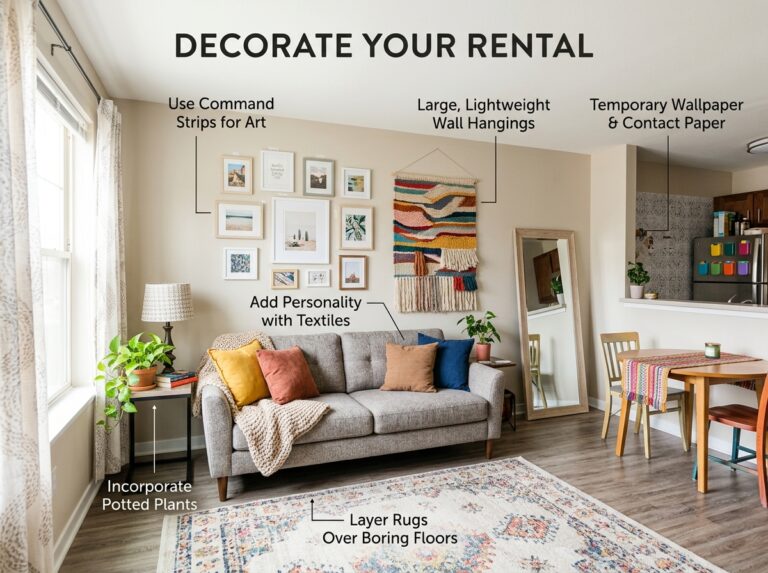
Most gallery-wall tutorials open with the hanging step: picture ledges, Command strip techniques, drywall anchors. Useful, sometimes, but addressing the wrong layer. The harder problem is the layout itself: how seven frames in different sizes balance against each other on a specific wall, at a specific eye level, in a specific room with a specific sofa or sideboard below them.
Three things go wrong in the planning stage that no hanging technique can fix afterward. The first is center misalignment, where the cluster’s visual weight sits offset from the furniture below, and the wall reads as tilted even though every frame is level. The second is eye-level error, where the cluster sits above or below the natural sightline. The reliable rule is that the middle of a gallery sits around 57 inches off the floor; rentals with low ceilings push that lower, and dining-room walls above a table push it higher. The third is internal spacing, where the gaps between frames are uneven and the cluster reads as messy rather than gallery-like. Most renters get one of those three right and two wrong, which is enough to make the finished wall look almost right instead of right.
None of the three are fixed by better hanging technique. They are fixed earlier, in the layout step, before any fastener touches the wall.
How a gallery wall planner works (paper, tape, or AI)
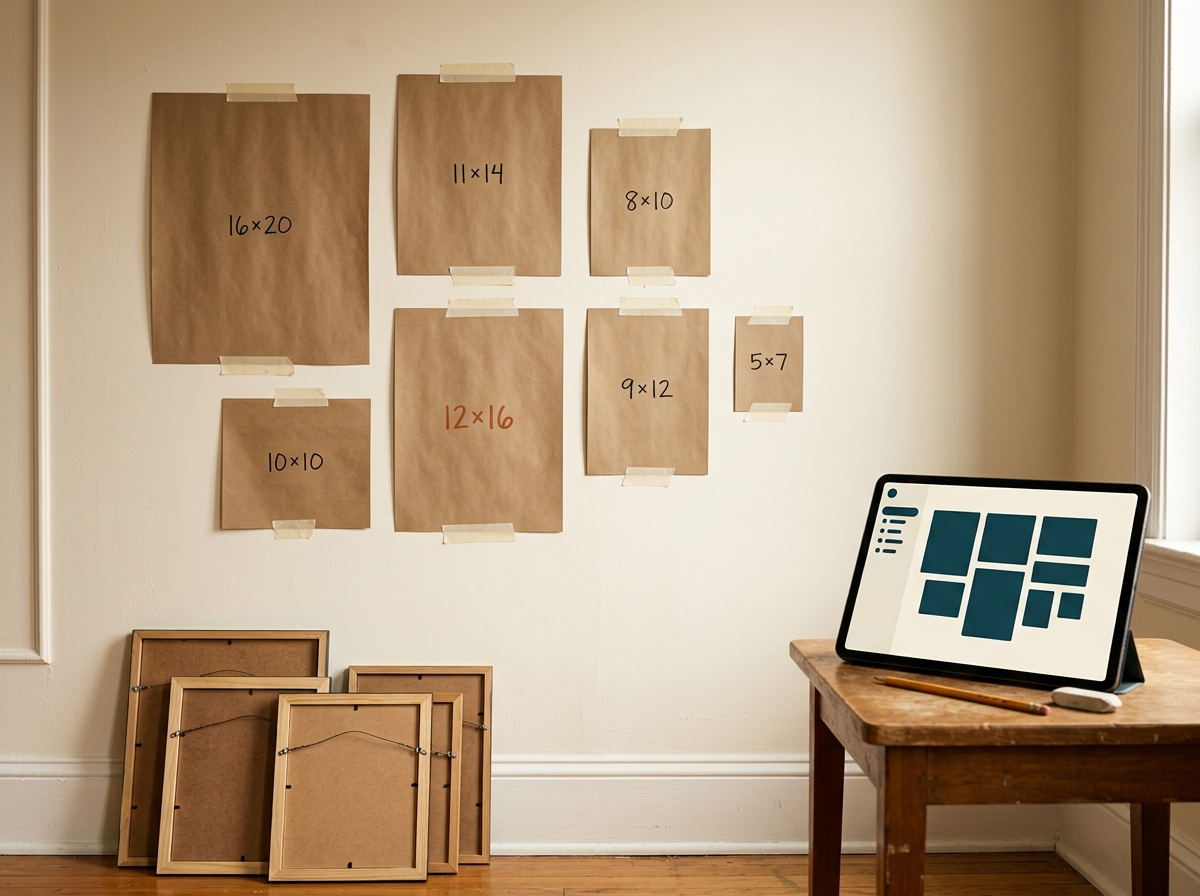
The traditional renter-safe planning method is the paper template. Trace each frame onto kraft paper, cut to the exact dimensions, label with the frame’s hanger-to-top distance, then painter’s-tape the cut-outs to the wall in the proposed arrangement. Step back six feet. Live with it for twenty-four hours. Adjust. Re-tape. Decide. Drill once. The whole point is to make every mistake in tape before any mistake gets made in drywall.
The faster version of the same step is the Gallery Wall Studio inside AI Home Studio. The planner reads a photo of the wall, the dimensions of the frames you already own (or are picking), and any furniture in the foreground, then renders three drawn-to-scale layout options with hanging coordinates marked in inches from the corners. A careful paper-template pass for a five-frame gallery takes about ninety minutes. The AI version takes roughly four minutes to surface the three layouts; you still tape one to the wall and live with it for a day, but the layout decisions are substantively made by the time the tape goes up. The planning thinking happens once, on a screen, with the wall photo as the canvas.
The hanging step is mechanical (if the plan is solid)
Once a layout is locked, hanging is transfer. Pick the right fastener per frame weight, mark the centers based on where the hanger sits on the back of the frame (not the geometric center of the frame), and drill or stick in the marked order. The renter-safe thresholds:

Skip the temptation to use Command strips for a twelve-pound mirror. They quietly fail at month four, the frame comes off the wall mid-summer, glass goes everywhere, and the wall now needs a drilled hole anyway. The math is the math: heavier pieces want hardware, lighter pieces want adhesive, and the threshold is around eight pounds.
The Gallery Wall Layout Kit PDF below covers the print-and-trace templates, the hanging-coordinate worksheet, the eye-level math indexed by ceiling height, and the fastener cheat sheet in a deeper version of the table above. It is the paper companion to the AI planner. Useful for renters who prefer paper plans, and as the on-the-wall reference once the AI layout is chosen.