
The first rental bathroom I tried to “upgrade” cost me money. Thirty dollars on a pack of peel-and-stick tiles, applied over the original tile on a Sunday afternoon, lived with for six months. Move-out morning, the tiles didn’t fully come off. A two-hour scrape job, a lot of adhesive residue, and the cleaning company billed the landlord eighty-five dollars for grout damage that came out of my deposit. Net upgrade after a year of decorating: a hundred and fifteen dollars lighter, plus six months of looking at slightly-better-but-still-rental tile.
Most rental-bathroom-upgrade content is organized by aesthetic. Cute caddy, peel-stick this, contact-paper that. Almost none of it is organized by what actually changes how the bathroom feels to use, or by the deposit-loss math hiding under each idea. The bathroom is the room where that math is most aggressive: water damage, grout damage, drilled-in hardware, paint stripping. Below are the four problems renters can actually fix, the three traps that look reversible but aren’t, and the 90-minute upgrade order I run in every rental I move into now.
Why rental bathroom advice is mostly noise
The aesthetic upgrades get most of the blog real estate. Peel-stick tile. Contact paper countertops. Removable shower wallpaper. Cute matching sets. They photograph well, which is why they rank well, which is why they keep getting recommended. They also produce the smallest perceived improvement in how the bathroom actually feels, while quietly carrying the highest deposit risk.
The things that do change how a bathroom feels almost never make the top-ten listicles. They’re lighting, storage, smell, and the ceiling. Boring. Cheap. Mostly invisible in a photo. Universally noticeable the second you walk in and brush your teeth. Once I started running this audit on every bathroom I moved into, the shopping cart at checkout changed completely. The cute stuff got dropped. The boring stuff was the actual upgrade.
Four bathroom problems you can actually fix
The four below are the entire universe of rental-bathroom improvements that move the needle. Sorted by how often I see them ignored, not by cost.
| Problem | What actually fixes it | Cost | Deposit risk |
|---|---|---|---|
| One harsh overhead bulb | Swap to a 2700K warm-white LED; add an outlet-plug warm nightlight near the floor | $8–12 | None. |
| No counter or shelf storage | Tension rod under the sink to hang baskets; tension-mounted over-toilet shelf (no drilling) | $15–25 | None. |
| Persistent damp smell | Small carbon-filter air absorber on a shelf; pour a cup of vinegar down the drain monthly | $8–15 | None. |
| A gross ceiling no one looks at | Magic eraser on an extension pole; report any active water spot to the landlord in writing | $4–10 | Actually protects the deposit. |
The ceiling is the one nobody talks about. Most renters never look up in their own bathroom. The ceiling is the largest single unbroken surface in the room, and on average it’s covered in a fine film of soap-steam dust, with one or two yellow-grey water spots near the vent. A six-dollar magic eraser, a five-dollar extension pole borrowed from the cleaning supplies, and ten minutes of work change the whole room more than any peel-stick anything. If you find an active water spot (not a stain, an actually-wet patch), email the landlord the same day, with a photo. That email is the difference between a deposit deduction and a landlord-paid repair.
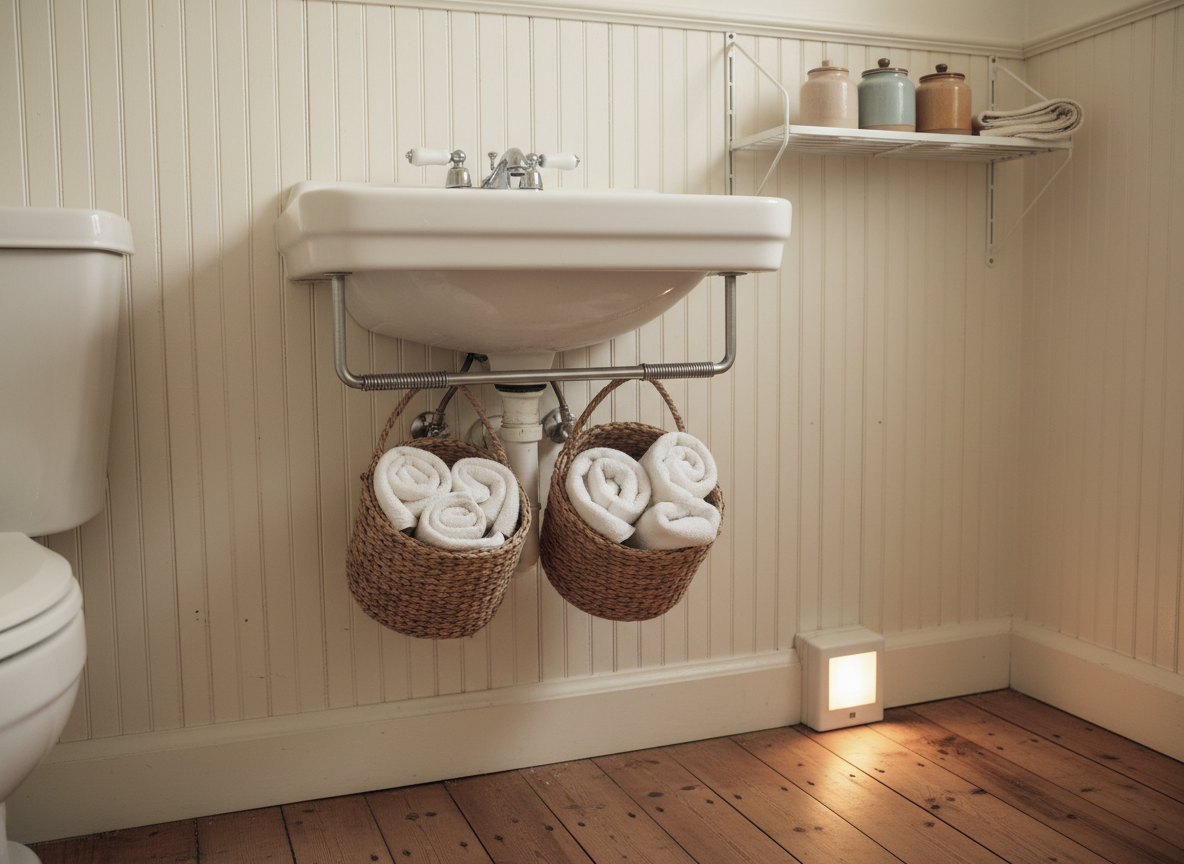
The same bathroom after the four fixes. Two tension rods, one bulb swap, one nightlight, one clean ceiling.
Three “upgrades” that look reversible but aren’t
The boring fixes above are the ones I run. The three below are the ones I’ve watched cost friends their deposits. All three are sold to renters as “fully removable.” All three are sold to renters by someone who isn’t paying the deposit.
Peel-and-stick tile or wallpaper applied over real tile or painted drywall. The marketing says clean removal. The reality is that six to twelve months under bathroom humidity bonds the adhesive deeper into grout lines or paint. Removal often pulls grout out with it, or strips the top layer of paint. Deposit risk: $50–$300+, depending on how much surface area you covered. If the bathroom advice in front of you involves applying anything sticky to a surface you don’t own, close the tab.
“Removable” showerheads with thread adapters. Most adapters seal fine the first month. The slow leak develops at the threaded joint between the original arm and the new fixture, runs down inside the wall, and shows up six months later as a stain on the ceiling of the apartment below. Deposit risk: $200–$2,000, plus a small chance of a water-damage claim from a neighbor. If you must change a showerhead, use plumber’s tape on every thread, leak-test for a week, and put the original back on at move-out. Save the original. This is the single most important sentence in this post.
Drilled-in towel hooks or rods with the “we’ll patch them later” plan. Spackle, sand, paint-matched touch-up. Three steps most renters do once and never do well. The final paint won’t match unless the patch is primed first, and most spackle jobs ghost through a year later. Renter-friendly wall decor covers the no-drill alternatives that work, and our deposit-safe decorating playbook has the patch-and-paint protocol if you’ve already drilled. Deposit risk: $25–$100 per visible hole.
The 90-minute, $40 bathroom upgrade order
This is the sequence I run in every rental now, in this order, in roughly ninety minutes, for about forty dollars. Zero deposit risk if you keep the original bulb and showerhead in a labeled bag in the closet.
- $82700K warm-white LED bulb. Swap the harsh overhead first. The bathroom feels different in two minutes.
- $5Outlet-plug warm motion-sensor nightlight. Eliminates the 3 a.m. overhead flash.
- $12Two tension rods. One under the sink for hanging two baskets; one in the shower for a second caddy.
- $10Tension-mounted over-toilet shelf. No drilling. Holds the towel-and-toiletry overflow.
- $4Carbon-filter air absorber. Set behind the toilet. Replace every three months.
- $3Magic eraser on an extension pole borrowed from cleaning supplies. Ceiling done in ten minutes.
Total: ~$42. Time: ninety minutes. Deposit risk: zero. Aesthetic improvement on Instagram: invisible. Aesthetic improvement on Monday morning at 6:45 a.m.: substantial.
After this sequence, the bathroom doesn’t look transformed in a photo. It feels transformed to actually use. The cute stuff (the art print, the matching towels, the small framed mirror near the sink) belongs in a second pass, once the four problems above are solved. The order matters because aesthetic upgrades on top of a bathroom that still has the harsh overhead, no storage, and the dusty ceiling are aesthetic upgrades layered on top of the problem. Solve the problem first; the personality layer goes on cleaner, and the deposit stays where it belongs.