You’ve been staring at that blank wall for months. Every time you pick up a hammer, the same questions stop you: Where do I start? How far apart should frames be? What if I get it wrong?
So the wall stays blank. Here’s why: most people approach gallery walls backwards — buy frames, eyeball a spot, hope for the best. The result? Art too high, too scattered, and a wall full of holes that prove it.
The better approach: Plan first. Preview second. Hang last.
Step 1 — Measure First (Not Optional)
Before thinking about frames or aesthetics, know your actual working space.
📏 Usable Width = Wall Width minus clearances: 8–12″ from door frames, 6–8″ from corners, 4–6″ from outlets.
📏 Above furniture rule: Gallery wall should be ⅔ to ¾ the width of the furniture below it. Wider = top-heavy. Narrower = afterthought.
Step 2 — The Layout That Matches Your Skill Level
- Grid: Same-size frames, even spacing. Easiest to execute. Best for modern/minimalist spaces and first-timers.
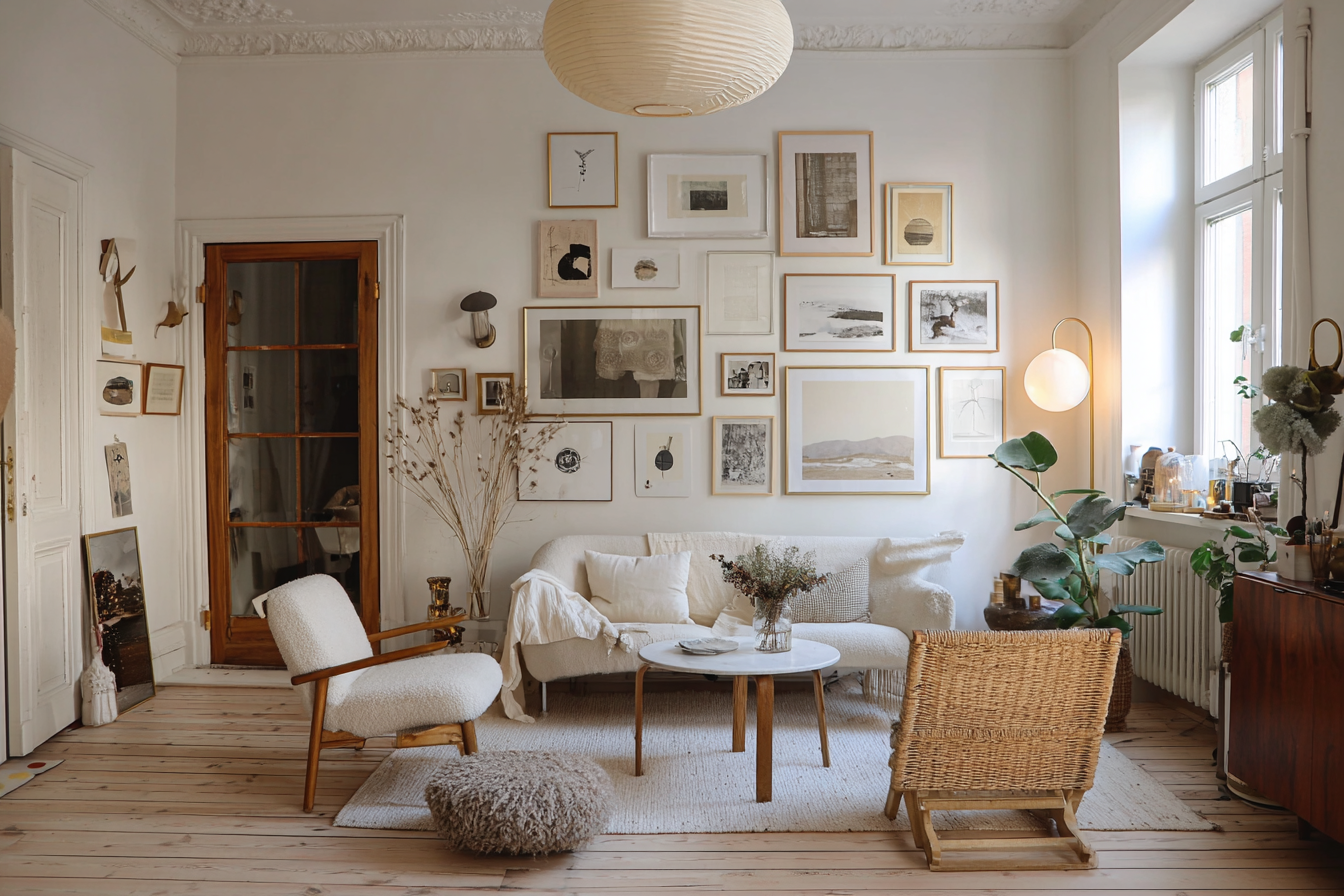
- Horizontal line: 3–5 frames in a row. Perfect above a sofa or bed.
- Salon (mixed sizes): One large anchor, medium and small frames built outward. Most personality, most planning required.
- Vertical stack: 3–4 frames in a column. Ideal for narrow walls and hallways.
Step 3 — The Spacing Rules That Make It Look Professional
📐 2–3 inches between all frames — consistent throughout. This is what separates amateur from professional. When spacing is random, it reads as “ran out of ideas.”
📐 Center of the gallery: 57–60″ from the floor on an empty wall. 6–8″ above furniture top if hanging above a sofa or bed.
Step 4 — Preview Before You Commit (The Paper Method)
Trace each frame on kraft paper or newspaper. Cut out. Tape to wall with painter’s tape. Live with it for a day. Rearrange. Step back from across the room. When you love it, mark nail placement through the paper, remove, and hang.
This takes 30 extra minutes and saves you from a wall full of regret holes.
Step 5 — Renter-Safe Mounting Guide
- Under 5 lbs (most small frames): Command strips. Clean wall with rubbing alcohol first. Follow weight limits exactly.
- 5–16 lbs: Small finishing nails (15-gauge) at 45°. Tiny holes, easy to patch with $5 spackle.
- Over 16 lbs: Wall anchors. Larger holes but fully patchable in 10 minutes.
3 Mistakes That Ruin Gallery Walls
Hanging art too high. Trust the 57-60″ rule. It will feel low. It’s correct.
Starting from the corner. Always start with the largest/center piece and build outward.
Mixing too many frame finishes. Maximum 2. All black works. Black + natural wood works. Four finishes = chaos.
Get the Ultimate Gallery Wall Layout Kit
Everything you need: planning guide, layout templates, spacing rules, and renter-safe mounting — all in one download.
Get the Gallery Wall Kit →